Markdown All in One by Yu Zhang
Google Chrome -> print to pdf -> A4, Portrait,
Margins: top, bottom 1" left, right 0", Scale 140%
[ ] Headers and Footers
[ ] Background Graphics

234567891123456789212345678931234567894123456789512345678961
--------|---------|---------|---------|---------|---------|-
LAB 1
-
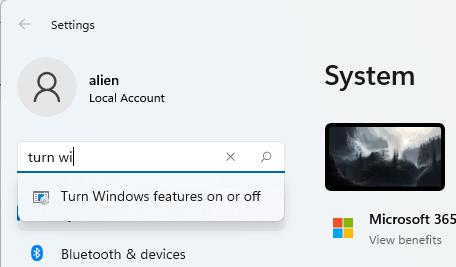
Open "Settings" on your host Windows computer

-
Turn Windows Features on or off. Reboot may be required.
-
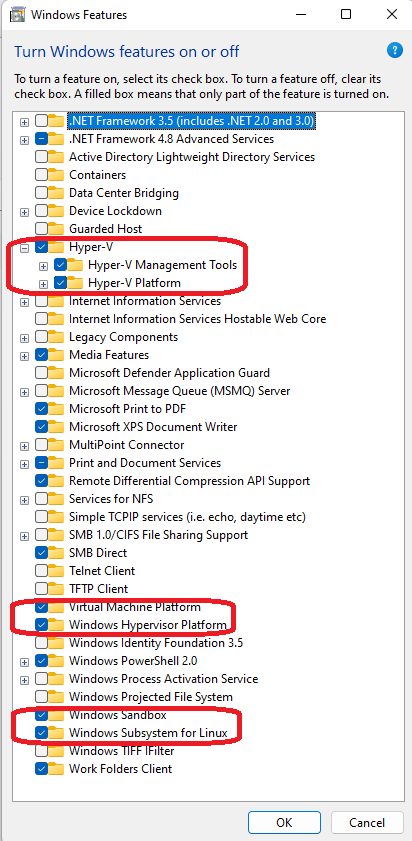
My features are as shown below:
-
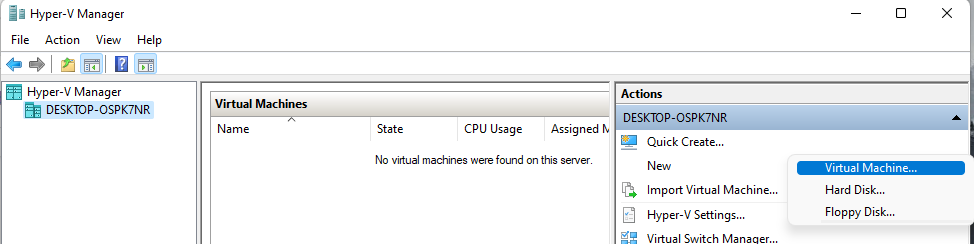
Now run your Hyper-V manager. Use Find menu if this icon is not on Desktop/Task bar.

-
Create new Virtual Machine:
-
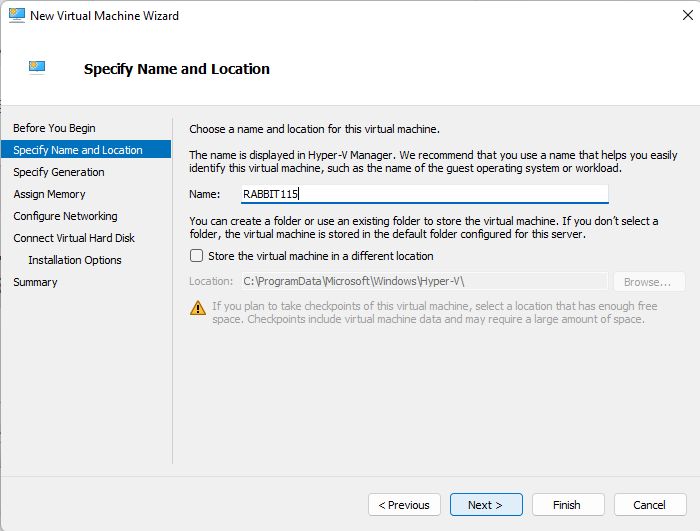
Specify Name and Location:
-
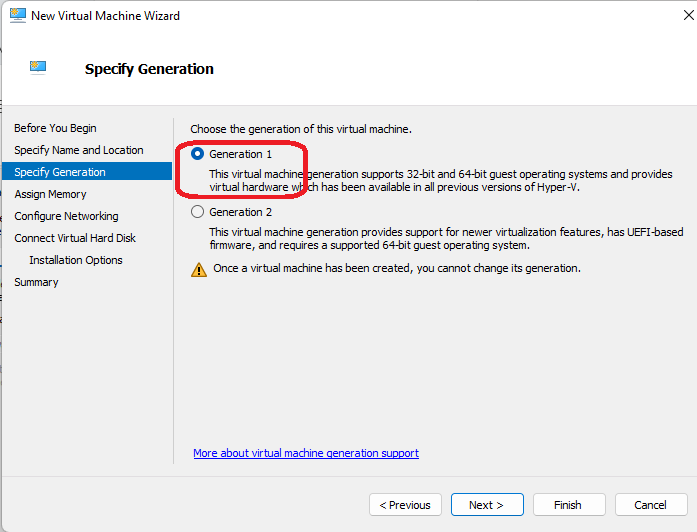
Generation 1 is required (second generation is used for windows guests to allow so called Enchanced sessions (See View menu) with copy/paste, drag'n'drop between the host and the guest machines):
-
Use powers of 2 to assign necessary memory amount: 512, 1024, 2048, 4096, 8192, etc. memory should be small enough, let's say <= HostRAM/2)

-
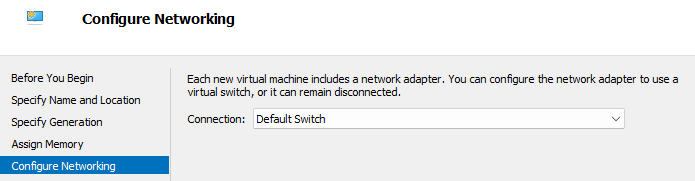
By default Default switch virtualize NAT networking on your Guest.
-
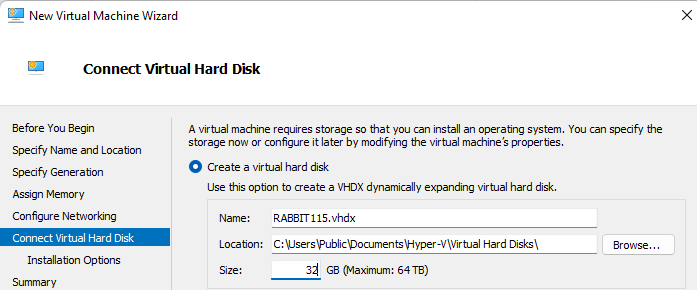
Virtual HD should be smaller than available space on Host, and big enough to allow successful install of the system of your choice)
-
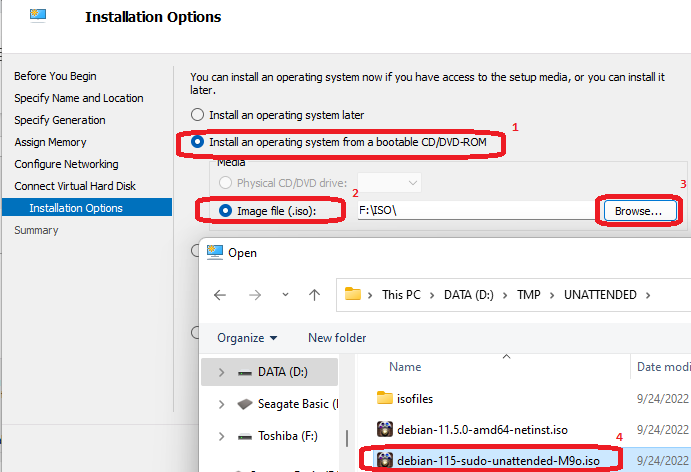
Use just created unattended ISO to make fully automated install:
-
Check that everything looks fine and press Enter
-
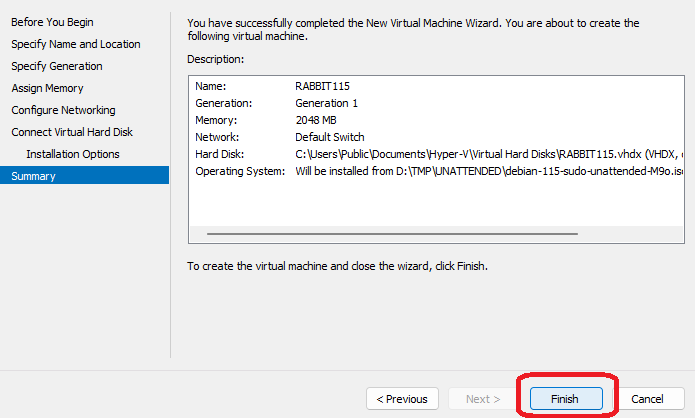
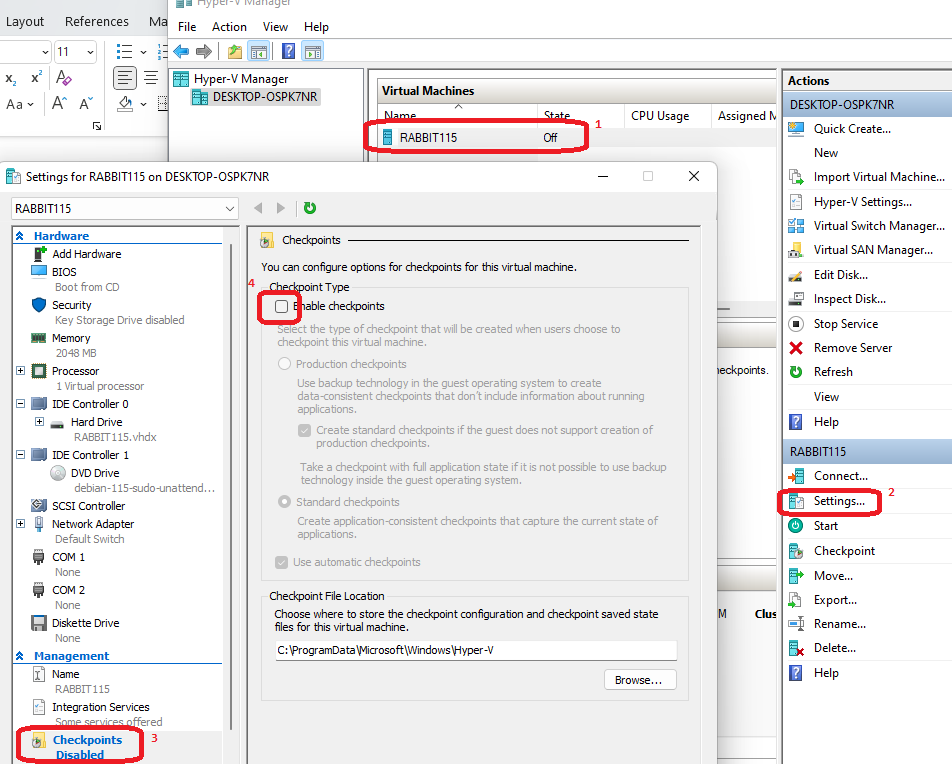
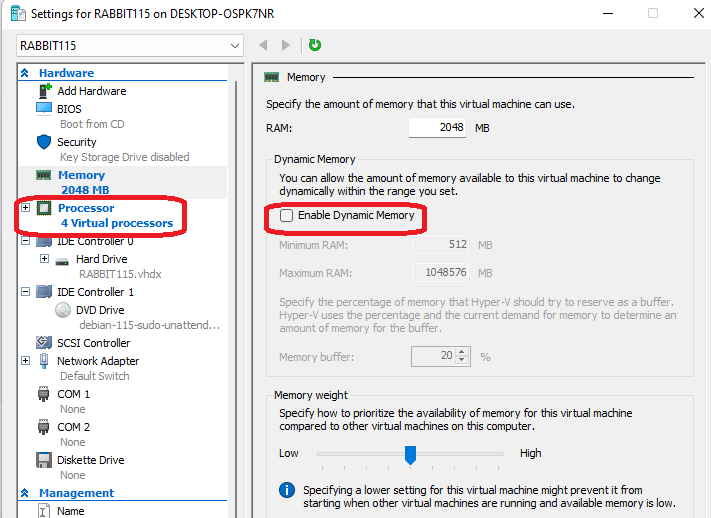
Change settins for the virtual machine just created:
-
Disable checkpoints (allows you to copy VM HD image between different hosts)
-
Disable dynamic memory (allows you to run more than one virtual machine at the same time)
-
Optionally increase processors cores (stay below physically available amount of cores on host)
-
Start the guest OS installation process (takes time, ~5 min, user/password settings are visible in myiso115 script)

-
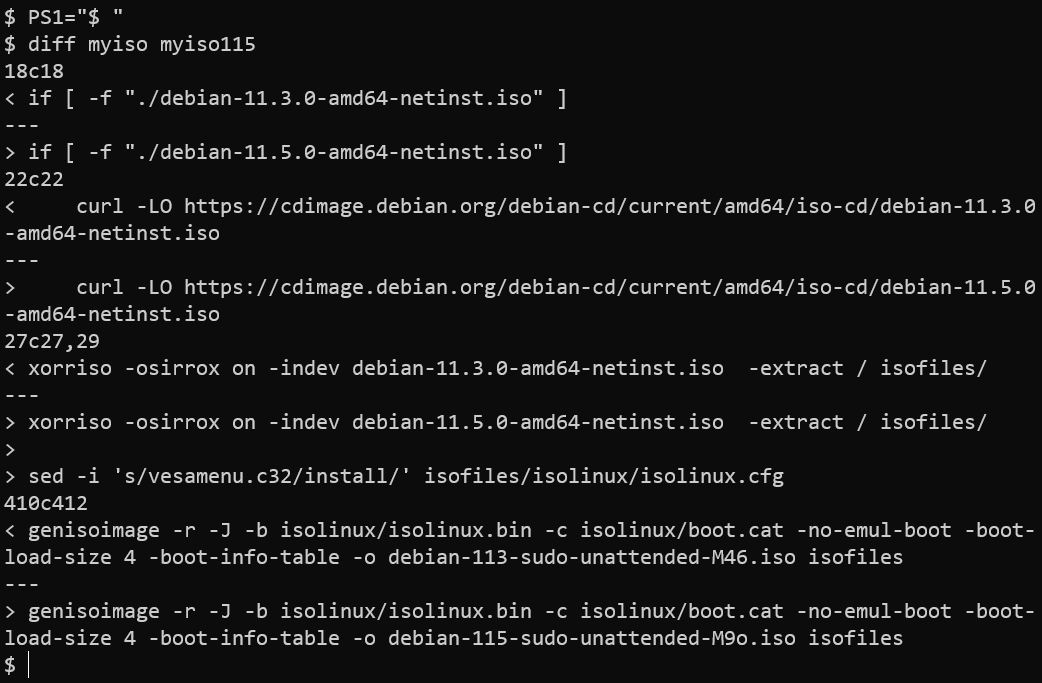
Surprise! myiso script for versions 11.3 and below is not 'Unattended' anymore. We need to fix this script and repeat the whole procedure:
-
Read this:
https://unix.stackexchange.com/questions/532252/how-to-automate-selection-of-type-of-installation-by-editing-isolinux
-
Fix myiso script as follows: …
1. xorriso ...
2. sed -i 's/vesamenu.c32/install/' isofiles/
isolinux/isolinux.cfg
3. curl -
-
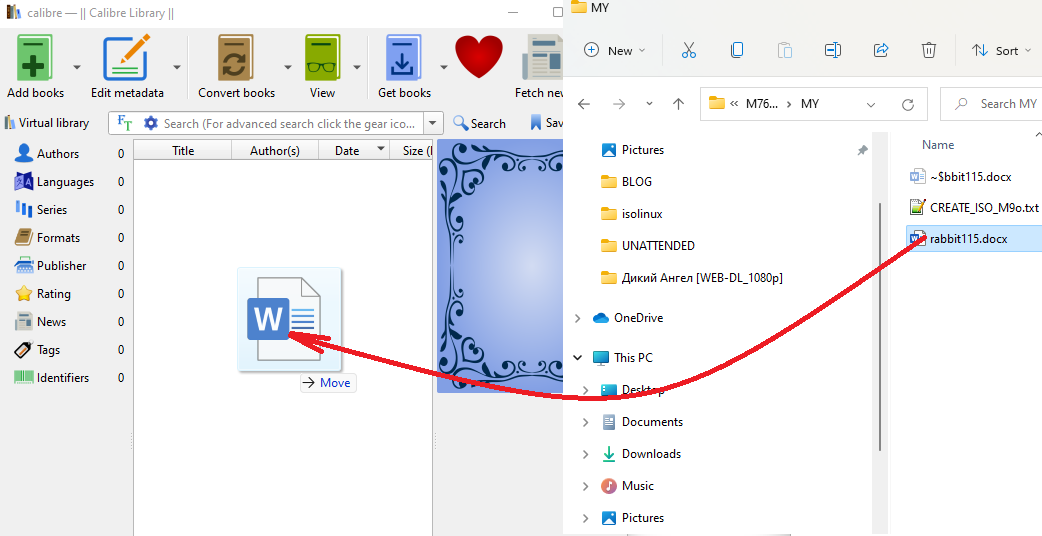
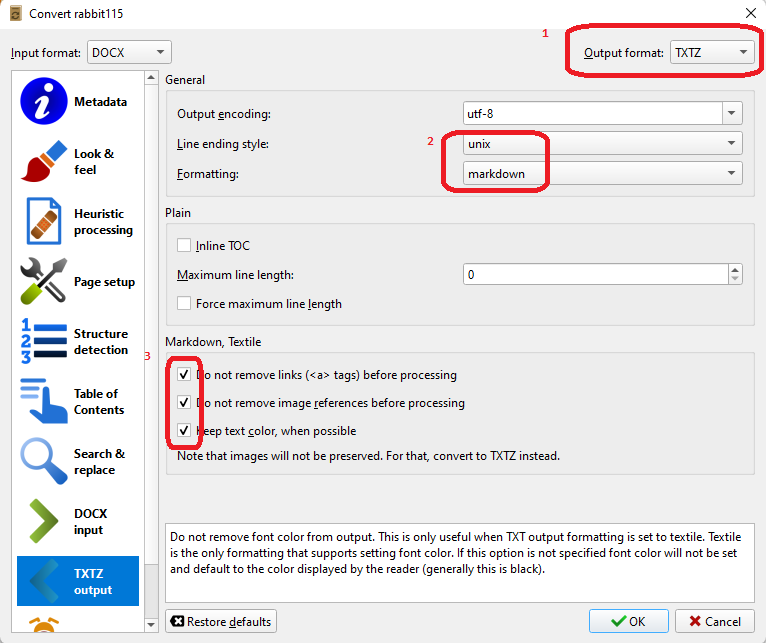
Now it’s time to convert this Microsoft DOCX file into MD (markdown). This is needed to satisfy the license requirements in classrooms and some third places.
-
Use Calibre latest to convert from DOCX to TXTZ
-
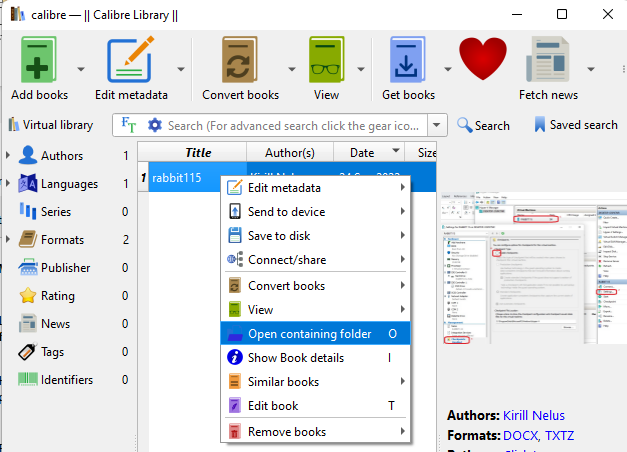
To see the result open 'containing folder' with txtz archive.
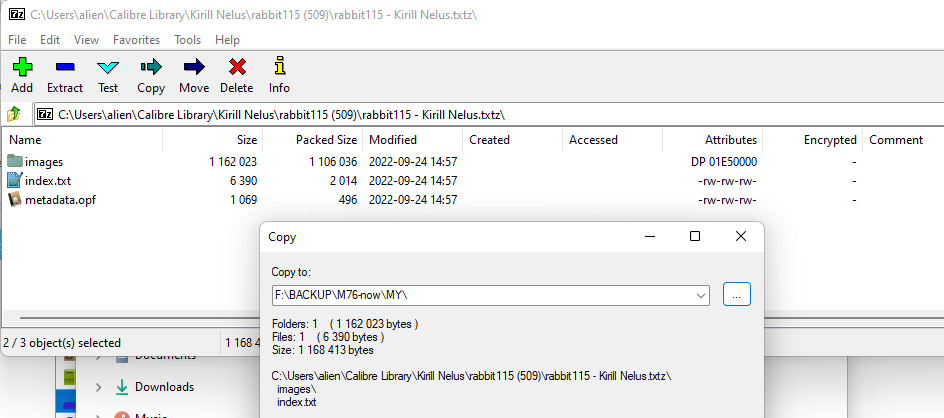
-
Open this archive using 7z extractor (Create necessary association between TXTZ extension and C:\Program Files\7-Zip\7zFM.exe)

-
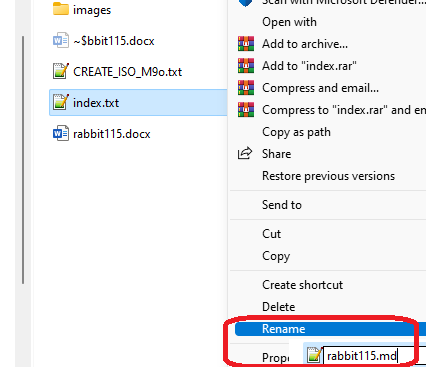
Rename index.txt to MD file
-
Now it’s time to finish our p.16. Let's do this using our WSL console.
Additional notes to “Surprise”
- Latest Notepad++ doesn't even let you edit RO files, not just requires to save them under different name/location (which seemed logical)
Annex 1. Offlined article
How to automate selection of type of installation by editing Isolinux?**
https://unix.stackexchange.com/questions/532252/how-to-automate-selection-of-type-of-installation-by-editing-isolinux
I'm trying to fully automate the process of Debian 9 installation, by using a preseed config file. The OS will be installed inside a VM on a remote headless server.
The only step which still requires user interaction is the main menu of the installer when I have to select the type of installation. See picture: ![enter image description here]
(./images/RAB22.jpeg)
So how do I automatically select one of the options here? Specifically I want to select Advanced options, and then Automated install. I think by editing the isolinux files, I should get there, but I don't quite understand these files. According to this article I modified the following isolinux files like this:
gtk.cfg
label installgui
menu label ^Graphical install
kernel /install.amd/vmlinuz
append vga=788 initrd=/install.amd/gtk/initrd.gz --- quiet
adtxt.cfg
default auto
label expert
menu label E^xpert install
kernel /install.amd/vmlinuz
append priority=low vga=788 initrd=/install.amd/initrd.gz ---
include rqtxt.cfg
label auto
menu label ^Automated install
menu default
kernel /install.amd/vmlinuz
append auto=true priority=critical vga=788
       initrd=/install.amd/initrd.gz --- quiet
But nothing changed. The cursor was still on the Graphical install, and I cannot afford user interaction. Can someone point me to the right direction?
asked Jul 26, 2019 at 8:57
Answer
The autoselect keyword did not work for me, but I'm using Debian 10 so meh. I just changed the line in isolinux.cfg:
default vesamenu.c32
to
default install
...
![![enter image description here] (./images/RAB22.jpeg)](https://i.stack.imgur.com/dSB0z.jpg)